The Pump in Raindancer
This section guides you through the most important settings and configurations of the Beacon.
Settings
The settings for the Beacon are quite extensive and complex. In most cases, the relevant settings for the initial setup of the Beacon revolve around the analogue inputs and outputs as well as the error codes and the corresponding messages.
Analogue Connections
Value Ranges
The analogue inputs and outputs each have an operating mode and a value range. These two values indicate how the signal is output or expected and in which ranges the measured values fall. The scaling is linear.
EXAMPLE
A pressure adjustment is made via a 0-10 V signal.
The saved value range of 0 to 16 bar results in an output signal of 5 V when selecting a target pressure of
8 bar.
Outputs
With the two analogue outputs, you are free to choose what you want to use them for. By default, we use them to control pressure. However, if your application deviates from the standard, you can use the user-defined option to specify a name for the input and a corresponding unit of measurement. The measuring unit is used together with the value range.
In addition to the value range and the mode, you also have the option to activate manual changing of the value via the app or the web portal.
You can also customise this option by setting a value range and a corresponding increment that is available for manual adjustment.
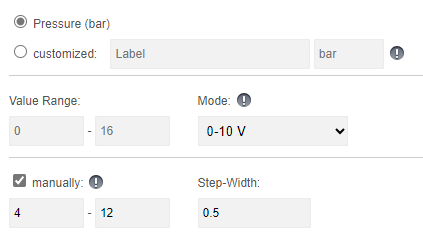
Example
In this scenario, it is possible to select a manual value between 4 and 12 bar.
The options for setting this value would each be in 0.5 bar intervals. In this example, you therefore have the option of setting the pump to 6.5 bar with a target pressure, but not to 7.2 bar or 13 bar
As you can see, you can customise your outputs here and adapt them to your individual application.
Inputs
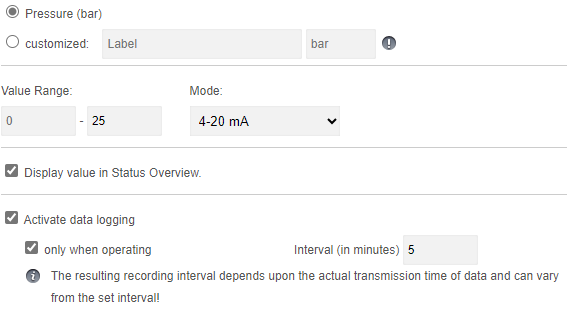
With the four analogue inputs, you are free to choose what you want to use them for. In the standard version, we assume pressure, power, flow and rotation speed. However, if your application deviates from the standard, you can use the customised option to specify a name for the input and a corresponding unit of measurement. The unit of measurement is used together with the range of values.
Options and visibility
This information is displayed on the details tab of your pump, accessible through both the app and the web portal. You can view this value whenever you wish.
Activating the logging options enables you to monitor the pressure values of your pump in detail and see them in the reports.
Meter Reading
The Beacon allows you to connect a digital water meter and automatically log water consumption. Alternatively, you can also use the same input to connect a rain gauge. You must select the appropriate option and enter the corresponding meter tick. The meter tick determines how many ticks are required for one litre of flow.
Please remember that if you change the mode of the analogue inputs and outputs, you must send the configuration to the Beacon for the changes to take effect.
Error Codes & Digital Inputs
You have the option of freely setting the error codes that your Beacon can display. There are 3 digital inputs available for this purpose. Depending on which inputs supply which signal, a combination of 7 different error or status messages are generated, which you can see on the app and be notified of.
The standard configuration is as shown below:
| CODE | TYPE |
Default Message |
| 0-0-1 | Error Code | Frequency Inverter / Pump |
| 0-1-0 | Error Code | Motor temperature |
| 0-1-1 | Error Code | Restart after interruption of the power supply |
| 1-0-0 | Error Code | Generic Pressure Error |
| 1-0-1 | Error Code | Exceeding Pressure Limit |
| 1-1-0 | Error Code | Pressure Limit Undercut |
| 1-1-1 | Error Code | Remote control OFF |
Digital inputs
With the digital outputs, you have the option of adjusting the pulse length according to your peripherals. By default, the beacon supplies a 125ms pulse to the corresponding outputs (1, 2, & 7) for starting and stopping as well as for the reset signal
Please keep in mind that if you change the pulse length at the digital outputs, you must send the configuration to the Beacon in order for the changes to take effect.
No Comments