Initial start-up of the M2M router
Optionally, the Raindancer Beacon comes with a preconfigured, ready-to-use M2M Router
(M2M – »Machine to Machine Communication«), prepared to be mounted to DIN Rails.
Overview
|
|
|
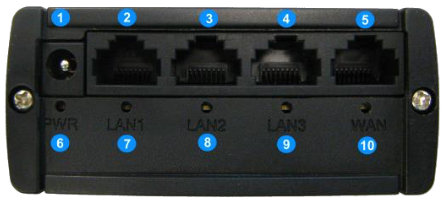
| 1 Hollow Pin / Terminal Block Port Power Supply 2, 3, 4 LAN Ethernet Ports 5 WAN Ethernet Port 6 Status LED Power Supply 7, 8, 9 Status LED LAN Ports 10 Status LED WAN Port |
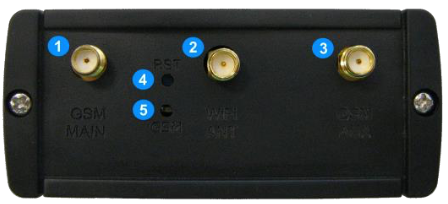
1 GSM Main Antenna Connector 2 Wi-Fi Antenna Connector 3 GSM Aux. Antenna Connector 4 Reset Button 5 Status LED GSM |
Setup
- Attach GSM Antenna to Connector [1] on the router’s rear panel.
Note: when lacking imprints, usually the GSM Antenna is the »thicker« one. - Attach Wi-Fi Antenna to Connector [2] on the router’s rear panel.
Note: by default, the preconfigured routers come with Wi-Fi deactivated, when not ordered with an alternative configuration, attaching the Wi-Fi Antenna is not required.
- Connect the Raindancer Beacon(s) via Ethernet cable to one of the ports [2], [3] or [4] on the router’s front panel.
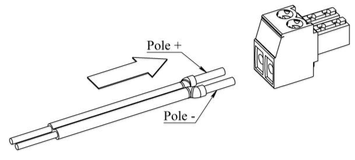
Note: Do not connect the Beacon(s) to the WAN Ethernet Port [5]! - Connect the power Adapter to the rocket on the
router’s front panel [1].
Pay attention to polarity, when connecting to an alternative power source
(9W/9VDC min, 12V rec., 18V/30V max, depending on router model type)!