Create Users and Manage Rights
In the Raindancer portal, select Config on the left-hand side, then User
You should now be in the user overview. Here you should find the "Administrator" and a "Service" user
(and possibly a "Support-*" user)
The "Service" and "Support" user allows the Raindancer support team and your dealer to access your application to help you with your questions. If you do not want this, you can deactivate or delete the service user, but you will lose the opportunity to be quickly supported by us.
(English Subtitle available)
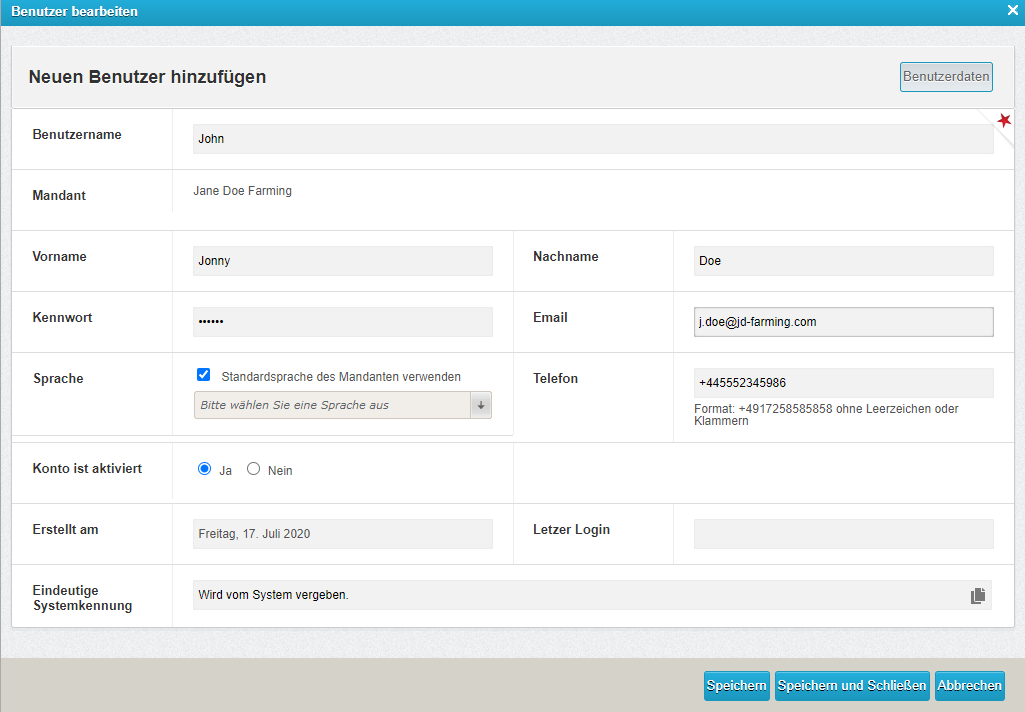
How to Set Up a New User:
- Click on the "New user" button

- Enter an Username, i.e. Firstname.Lastname
- Set Firstname and Lastname. This is important for the notifications page.
- Set a password (The password will show as empty when you save the user or call up the user again)
- With setting the email address and phonenumber fields you let us know how you would like to receive notifications from the raindancer system.
- Setting an email address has also the advantage that the user can reset their password if they need to.
- Select the notification method for this user. SMS or WhatsApp
Entering the telephone number will cause you to receive notifications (for a fee) via the specified channel
- Setting an email address has also the advantage that the user can reset their password if they need to.
- You can click on the
 Symbol next to the e-mail address or phone number to test the communication with raindancer.

A pop-up window will appear to notify you that a test message will be sent. Click on "Yes" to send the test message. - You can pre-select a different language for the user under "Language".
- Click the "Save" button to apply these settings.

Permissions (Memberships)
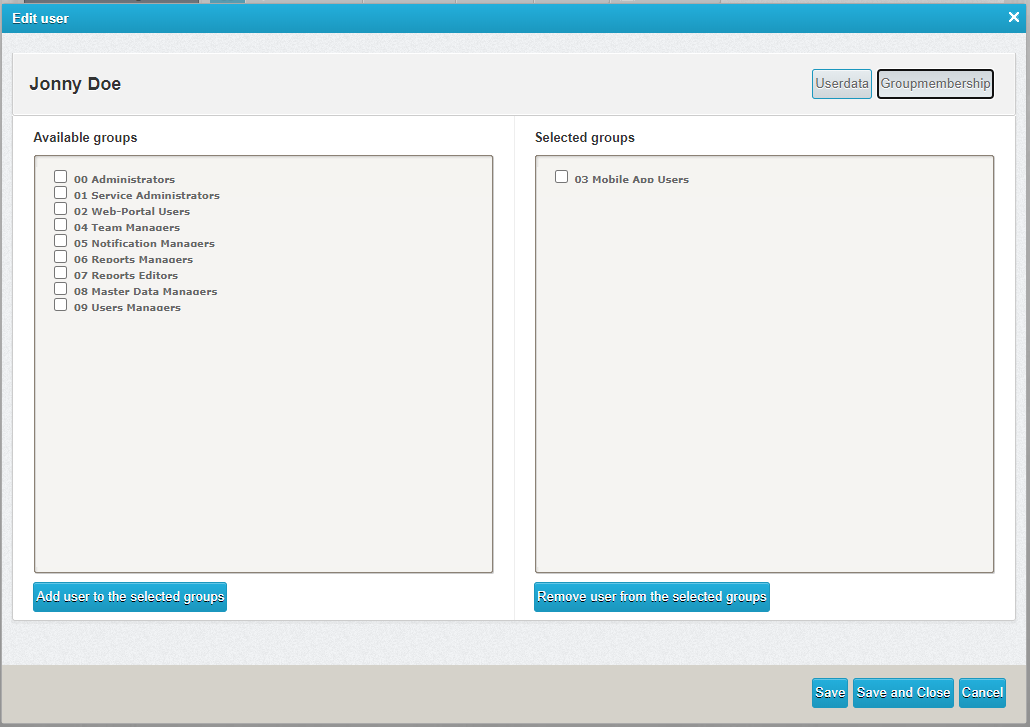
We have now created a new user.
To allow the user to use the app or access the raindancer portal, we have to grant him/her the correct rights/permissions.
-
- At the top right position, select "Groupmembership"
- You should see two columns.
On the left you have the available groups which you can assign to the user.
On the right side you see already assigned groups. - To assign a group to the user, tick the box next to the group that you want to assign to the user and click the "Add user to the selected groups" button.
The selected groups should have moved over to the "Selected Groups" column.
Click on the "Save and Close" button to complete the user setup. - Optionally, you can select which notifications your users should receive. Further information can be found here: Notifications
- At the top right position, select "Groupmembership"
Membership Groups
A brief explanation about the available membership groups:
| NR | NAME | EXPLANATION |
| 00 |
Administratoren |
Full access on your system |
| 02 | Web-Portal Users |
User can log on to the raindancer portal but cannot amend any settings. |
| 03 | Mobile App Users | User can use the App. |
| 04 | Team Managers | Responsible for the optional teams module and assembles teams |
| 05 | Notification Managers | Can adjust / set notifications |
| 07 | Reports Editors | Can edit / rebook completed assignments (May also edit the water quantities later) |
| 08 | Master Data Managers | Can manage crops and soils |
| 09 | Users Managers | Can manage users and corresponding settings |