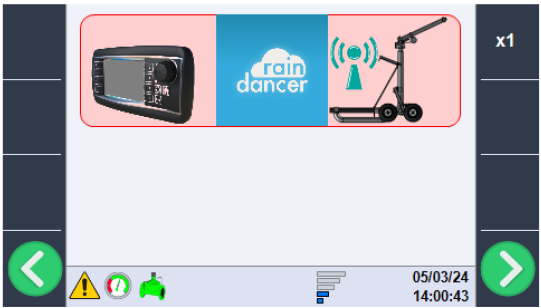
Irrigation Machine - Take Control, Remotely
Select your control unit and follow the instructions.
Please understand that we have no direct control over the software version of the machine computers and that these instructions may differ slightly from those on your machine.
If you have any further questions about the machine configurations, please contact us at www.raindancer.com/contact
Beinlich 2KR
Settings in Raindancer Mode
Set-Up the Raindancer Mode
Setup the GSM Module in Parameter-Settings
Buttons for entering the Parameter-Settings: MENU + D
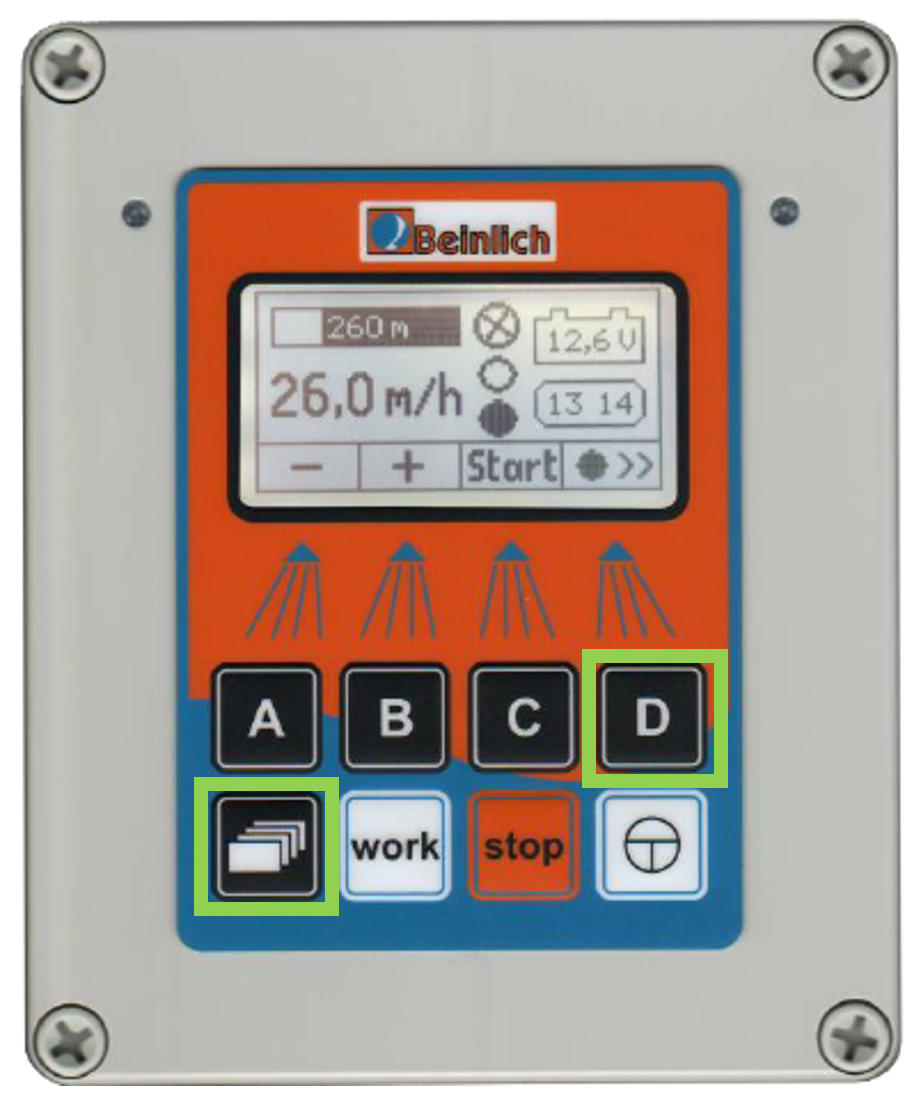
- Choose "GSM" with A/B and select with C
- Choose "Raindancer" with A/B and select with C and save with D
Setup the Raindancer-Connection in Main-Settings
- Enter Main-Settings with

- Choose "Raindancer" with A/B and select with C
- Type in Your Machine Number (freely selectable - example 001)
- At "Own" type in the SIM-Number (format: +31.....)
- At "Server" type in +4915251045215
- Confirm with D
Done!
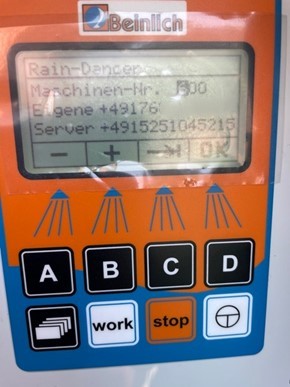
Own number:
This is the number of the SIM card that is installed in the control unit.
This number must also be stored in the Raindancer portal in order to access the machine
Server Phone Number:
| +31 970 144 449 93 |
Attention - Poor Signal Reception
The antenna connection is installed at the bottom of the box.
Elektronik_2KRH_V6.8.pdf (German)
Nortoft PR10-12
For SMS Mode
- Speed = 11,1 → Const 100.
- M.Data 30 = 1 (All phone numbers can send commands)
-
B = Enter Raindancer phone number in international format.RD-Classic Sim-Karte: +3197014444993RD-Conekkt Sim-Karte: +6260Own Sim-Karte: +4915251045215
-
M.Data 50 = 1
-
Menu Buttons → Save.
-
Check: Text Message with STATUS to the Nortoft Controller→ Status Text Message reply is expected
For Internet Usage
- Speed= 11,1 → Const 100.
- M.Data 30 = 1 (All phone numbers can send commands)
- M.Data 50 = 2
- Menu Buttons → Save.
- Check: Text Message with
("IP":"SETUP","READ":0)to the Nortoft Controller
→ Reply should contain Serial Number („SN“:)
If a telephone number is set up in Nortoft for SMS configuration, the SMS reply may be sent to this number and not to the mobile phone that sent the IP setup SMS. With IP, the SMS number can be deleted.
Detailed Instructions
Set the computer to the configuration mode:
Set Speed to 11,1 ( use Ë/¬ Buttons) and press 3 times the PROG-Button. The line with "Const 100" appears.
Step up this Value using Ë/¬ to 111 then click PROG again .
You now have access to the "M.Data" list, which you can navigate through using the PROG button.
Please note that not all M.Data numbers are available. After M.Data 24 comes M.Data 30. You cannot navigate backwards, but the list starts from the beginning after M.Data 55 [depending on the firmware version of the device].
Set the value of M.Data 30 to 1 using the Ë/¬ buttons. This activates the GSM modem. The following entries in the M.Data list are called A and B and represent two telephone numbers.
A restriction to two telephone numbers ( M.Data 30 to 2 ) is only permitted in SMS mode.
For Operation via IP
- Set the value of M.Data 50 to 2 using the Ë/¬ buttons.
- Save the entries by pressing the Menu button. This will take you out of configuration mode (M.Data list) and 'Status Power On' should appear.
- The serial number is labelled on the device and must be set as the identifier for the irrigator in the Raindancer portal.
The telephone number of the device SIM card must also be stored in the portal. As soon as the irrigator is configured and has a sufficiently good connection to the wireless network, you should be able to observe communication with the device. - To verify this, the serial number can be requested by sending a text message to the SIM card. The device sends a reply to the message
("IP": "SETUP", "READ":0), which contains the serial number ("SN":). - However, a proper function check only works if the remote control device with the serial number is assigned to the client via the client administration and an irrigator with the serial number & telephone number) has been set up. PING messages are then sent to the remote control screen every 5 minutes.
For Operation with Text Messages
- Use the Ë/¬ buttons to set the value for B after M.Data 30 to the Raindancer telephone number in the style +491520xxxx.
It is important that the entry B is used, otherwise the communication won't work.
If you have been supplied with a SIM card, use the following telephone number depending on the SIM card.
Raindancer SIM card: +3197014444993
RD-Conekkt Sim-Karte: +6260
Own SIM card: +4915251045215 - Set the value of M.Data 50 to 1 using the Ë/¬ buttons.
-
Save the entries by pressing the MENU button. This will take you out of configuration mode (M.Data list) and something should appear Status Power On.
-
If you send the STATUS command to the machine via text message the computer should send a status message to the set telephone numbers.
Setup Hüdig Control
The following settings must be made for Hüdig Controls.
- Activation of the GSM/SMS control
Save the SMS connection
Setup on the portal
Activation of the SMS control on the hose reel
A SIM card must be inserted into the machine and a configuration made on the Huedig Control. Detailed instructions can be found in Huedig Control complete (DE) on page. 25
Setting up SMS control via Text Message
Once the SIM card has been inserted and activated, control text messages can be sent to the computer.
Setting the Event Query
There is a defined pattern for this:
T 01 (Slot bis 19), Server Number (003197014444993), 9(all Events) Name
Beispiel:
T 01,003197014444993,9 RD
Setting the name of the irrigation machine in answers for easier assignment
There is a definite scheme for this:
T 20 (Slot for Name), Server Number (003197014444993), Name of Irrigator
Beispiel:
T 20,003197014444993,Irrigator 4
Checking the entered data
As soon as all settings have been made, queries can be sent to the Hüdig controller to check the respective memory data registers.
R + Number of Register
R 01
Irrigator 4:
T 01,003197014444993,9 RD
Further settings
For further settings there is the Instructions for SMS control from Hüdig
Ocmis API
This guide applies to all IP controllers in the OCMIS product family running software version 24.0.1 or later:
Irtec Smart Rain, OCMIS RainControl 5 & Marani
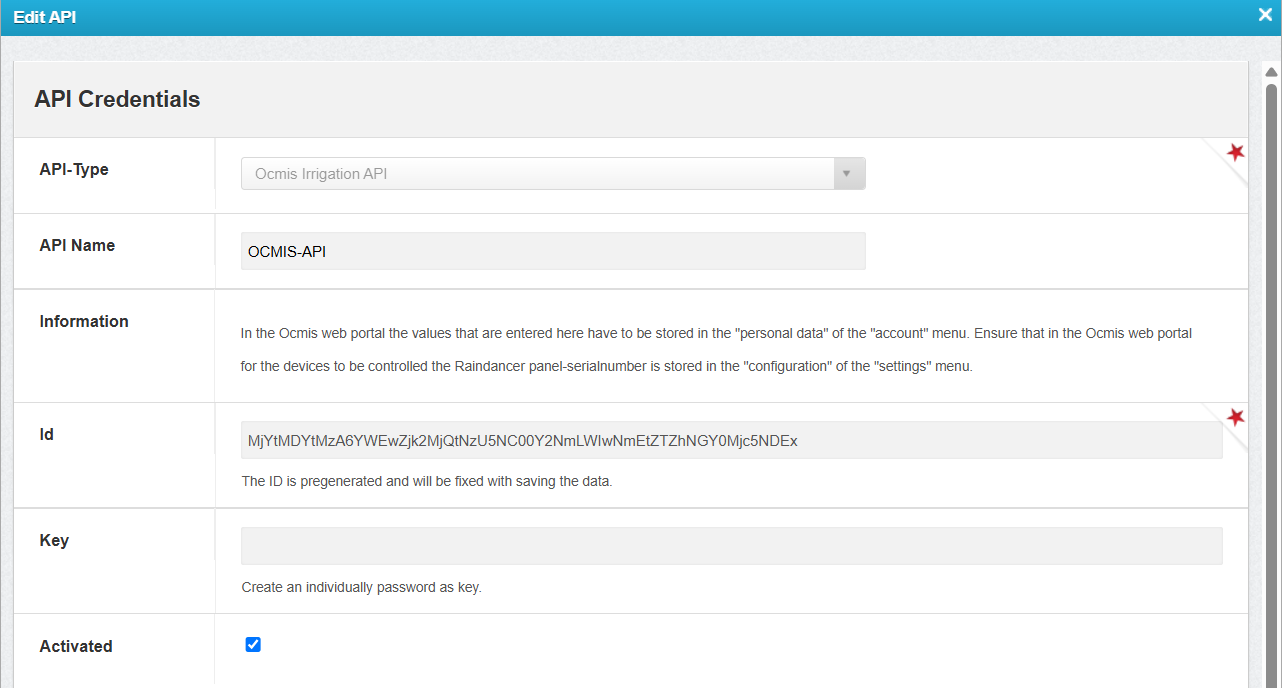
1. Create a New API in the Raindancer Portal
- Configure the API connection in Raindancer under Settings → API → New API

-
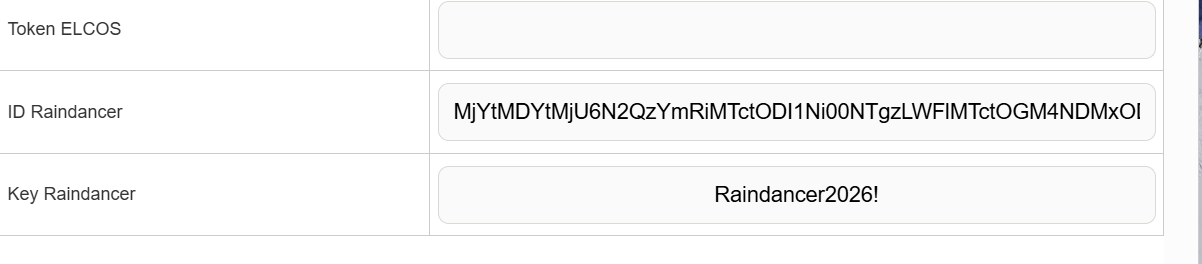
API Name: Freely selectable
Example: OCMIS API -
ID: Automatically generated
-
Key: Freely selectable
Example: Raindancer2026!
2. Configure the API and Irrigator in the OCMIS Portal
Enter the Raindancer API credentials in the OCMIS Portal.
- Log in to the OCMIS Portal (https://www.irriverso.com/)
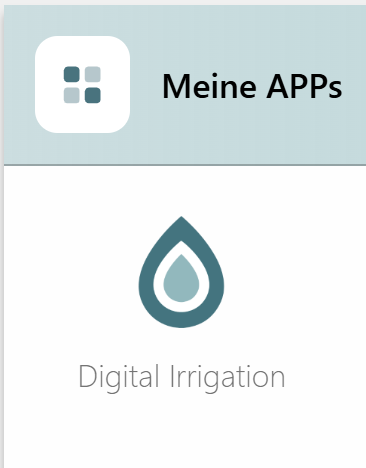
- Navigate to "My Apps" and click "Digital Irrigation"

- Click "Account"

- Click "Edit Personal Data"

- Enter the API ID and API Key, then click Save

Configure the Irrigator in the OCMIS Portal
- Open the Irrigator Overview.
-
Navigate to Settings → Configurations.
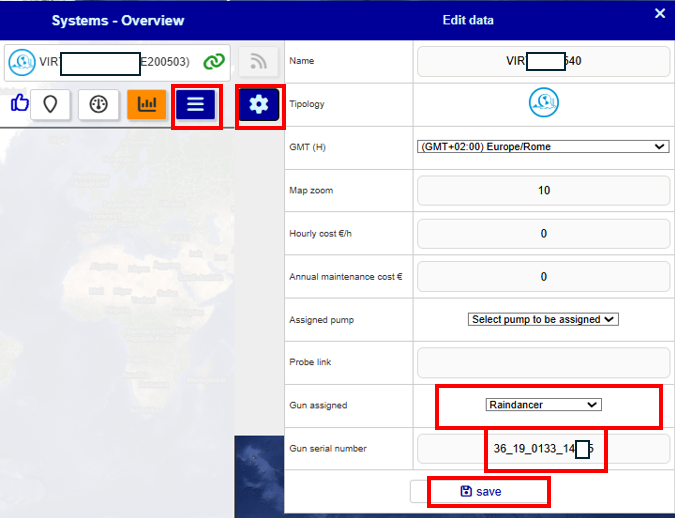
- Select Raindancer Mode and enter the serial number of the Raindancer module installed on the irrigator cart for this machine.
- Save

3. Assign the OCMIS Controller Serial Number in the Raindancer Portal
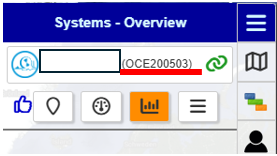
1 Find the Controller Serial Number
- Log in to the OCMIS Portal
- Copy the irrigator's serial number without the parentheses

2 Assign the Controller to an Irrigator
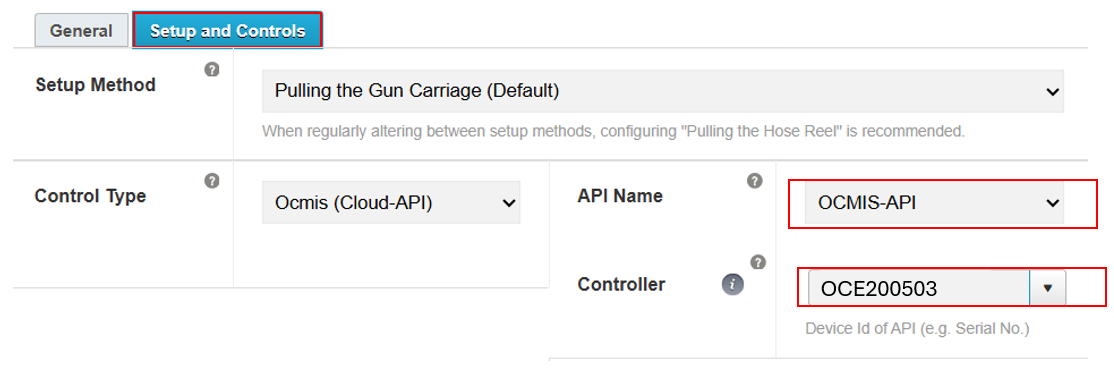
- Log in to the Raindancer Portal.
- Open the Setup and Controller section.
- Controller Type: OCMIS API
- API Name: The API name created in Section 1.2 (Example: OCMIS API)
- Select Controller: Choose the copied serial number from Section 3.1 (Example: OCE200503)

4. Set up the OCMIS control unit on the reel
For the following steps, it is necessary to familiarize yourself with the reel's user manual to avoid making incorrect settings. The manual also contains the access credentials for the various configuration menus of the OCMIS control unit.
It must also be ensured that the modem of the OCMIS control unit is active and that either a dedicated SIM card or the e-SIM of the installed router is working.
If you have any questions regarding the topics in this section, please contact your OCMIS sales partner!
Activate Raindancer mode for the irrigator trolley
-
First, enter the password ABC123 via the lock icon at the bottom left

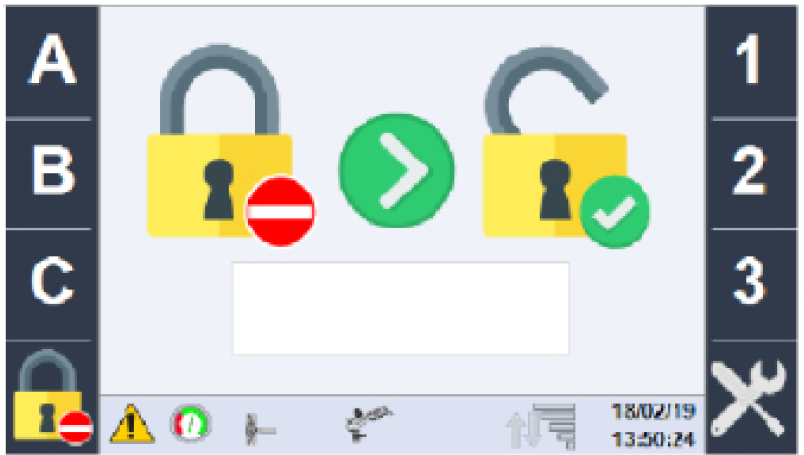
-
Now use the green arrow keys to scroll to the gun configuration, then use the rotary dial to switch to Raindancer mode
-
On the main page, click the cloud icon with the gear symbol
-
Click the "DIGITAL" button to switch to the Raindancer dependency mode


Irrimec Dosidis+ IP
Part 1: Setup on the Dosidis+ Device
What do you need?
-
Device switched on and ready
-
Appropriate SIM card (Raindancer or your own)
-
Access data (APN) – you will receive this from your dealer or service provider
Setup steps:
First, insert the SIM card into the device. Detailed instructions can be found in the manual under section 7.C (page 32).
What to do if the connection fails:
-
Verify the APN, URL, and port data have been correctly entered.
-
Check network reception at your location.
-
Restart the device to establish a fresh connection.
We recommend for Using the remote control a firmware of
- Dosidis+ of Irreg13 3 03 (11.02.2026) or higher
- Dosidis2 of Irreg12 6.02 (11.02.2026) or higher
Part 2: Integration into Raindancer (only by a service partner)
This part will be carried out by your Raindancer service partner.
-
Provide your service partner with the previously noted IMEI number.
-
The service partner will register the IMEI in the Raindancer system under:
-
Menu item: "Edit Irrigator" → "Irrigator Control"
-
Select control type: Irrimec Dosidis+ IP
-
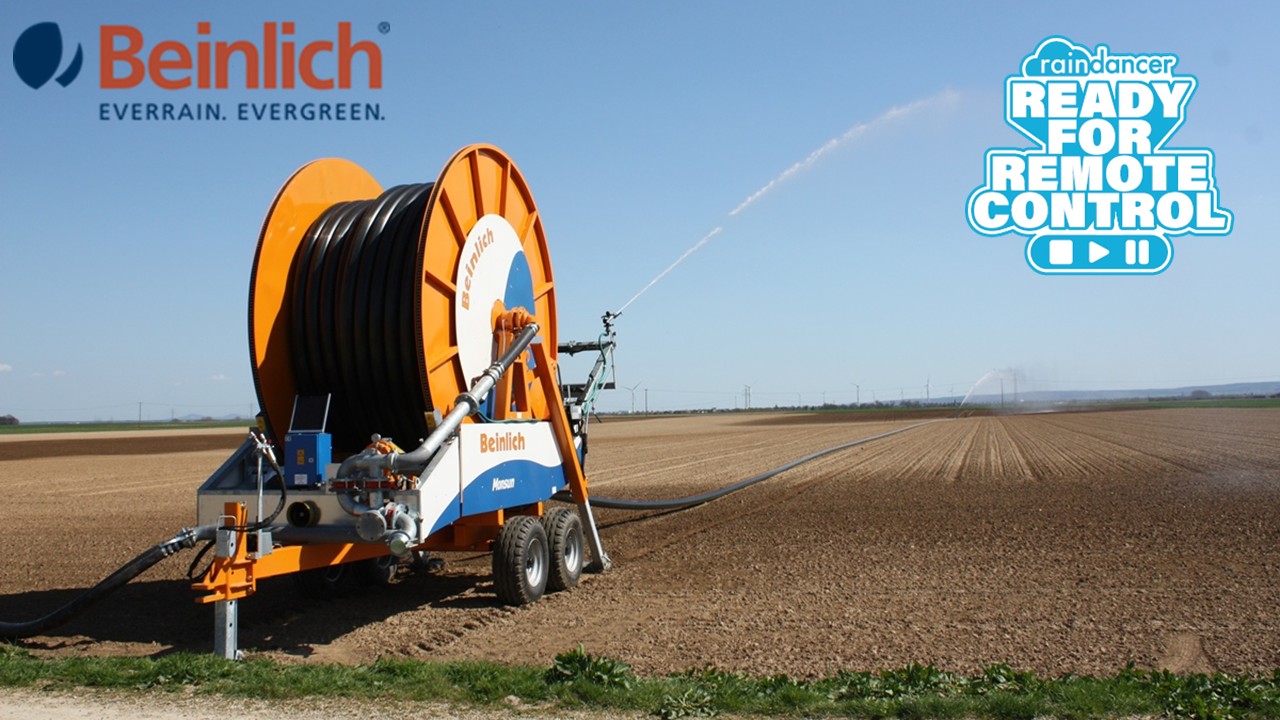
Beinlich 4KR
Create API users in Raindancer
Create a new user in the user overview on the Raindancer Portal
Username: API User
Password: You decide this!!! PLEASE MAKE A NOTE OF IT!!!
Store API user data in the Beinlich Cloud
Logging into the Beinlich Cloud
- Open the Beinlich Cloud using the following link:
https://everrain.beinlich-beregnung.de - Log in using your personal credentials.
These are provided by Beinlich. - In the top menu, navigate to the “Connection” section.
- Enter your login credentials.
- Click on “Test Connection”.
- If a green check mark appears, the connection was successful.
- Finally, click “Save” in the bottom right corner to store your settings.
If the connection test fails, please check the API user in the Raindancer portal again as well as the entries in the Beinlich Cloud. If it still does not work, please contact your Beinlich partner or Raindancer.
Configuration in the Raindancer Portal
- Switch to the Raindancer portal.
- Open the irrigator overview.
- Select the desired irrigator and click “Edit” in the corresponding row.
- Navigate to the “Setup and Control” tab.
- Select “Beinlich API” as the control type.
- Then choose the appropriate control device from the dropdown menu.
This device is named after your irrigation system in the Beinlich Cloud
Where to Find the SWS Number on the Machine. The SWS number can be found in the main menu of the Beinlich controller. Alternatively, you can open the controller and read the SWS number on the inside of the cover. Please note that it may be difficult to access or read due to internal wiring.
Configure the Beinlich Controller before first use
If the machines are not yet displayed online in the Beinlich Cloud during the initial setup, this may be because the controllers first need to be configured.
The configuration can be completed easily in just a few steps. Please follow the step-by-step guide in this 4KR Verbinden mit dem Everrain Portal (2).pdf.
Costs
Billing for the Beinlich Cloud, including the SIM card, is handled directly by Beinlich and charged to the end customer.
As of April 22, 2026, the annual fee is €100.